
How We Test Shoes: Inside the Urban Style Footwear Lab
By Abdul — Footwear Specialist, Urban Style Footwear
I’ve spent more than two decades on shoe floors, in stockrooms, and now in a lab, and if there’s one thing I’ve learned, it’s this: a shoe box never tells you the whole story. Marketing copy says a midsole is “ultra-responsive.” A tag says a shoe is “breathable.” None of that means much until you’ve actually taken the shoe apart and put it through its paces.
That’s exactly what we do here. Every shoe that gets a rating on this site has gone through a two-part process — a wear test out in the real world, and a lab test where we measure, cut, torch, freeze, and otherwise interrogate the shoe until the numbers hold up. Below is a plain-English walkthrough of how that actually works, and why we bother.
Why We Do Both a Wear Test and a Lab Test
Neither test alone tells you enough.
A lab reading can tell you a heel counter flexes at a certain force, or that a midsole registers a specific hardness on a durometer. What it can’t tell you is whether that stiffness feels supportive or just plain annoying after mile six. That’s where actually wearing the shoe — on pavement, on trail, on court, in the gym — fills in the gap.
So every shoe we review gets:
- Worn in the conditions it’s designed for, so we can speak to real-world fit, comfort, and feel.
- Measured in a controlled lab environment, so our claims are backed by repeatable data rather than gut feeling.
We keep our lab at a steady 20°C / 68°F (±1°C) with humidity held around 55% (±5%), both in the testing room and in storage. Temperature and humidity swings genuinely change how foam and rubber behave, so we don’t let that variable creep into our results. Wherever it applies, we lean on recognized industry frameworks — ISO, SATRA, and ASTM protocols — and adapt them where footwear technology has moved faster than the standards have.
One Pair Stays Whole. One Pair Doesn’t.
Every shoe we test is purchased in pairs. One pair is worn and reviewed as-is. The other is sacrificed for science.
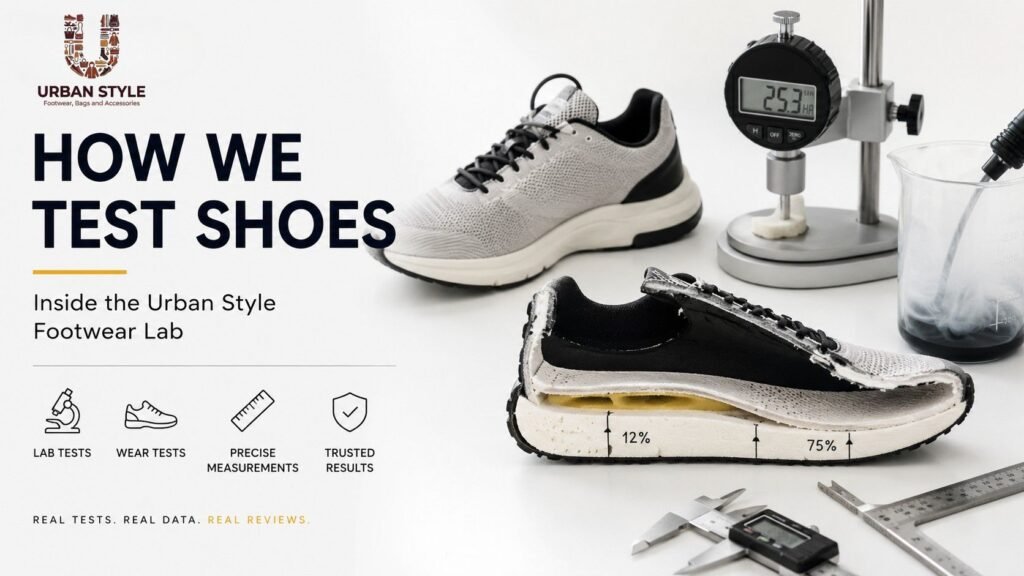
We start by separating the upper from the sole unit entirely, then take a band saw to the midsole and split it down the middle, lengthwise. This isn’t just for show — several of our measurements are physically impossible without doing this.
What the dissected shoe lets us do:
- Test energy return and shock absorption at the exact heel and forefoot pressure points
- Measure true stack height at the shoe’s center (not the sides, where padding can distort the number)
- Calculate heel-to-toe drop accurately
- Check midsole softness at room temperature and after a stint in the freezer
- Measure insole and tongue thickness precisely
You’ll notice marked lines on the cut midsole in our photos — those sit at 12% and 75% of the shoe’s internal length. That’s not arbitrary; it mirrors the measurement points used by World Athletics for elite footwear eligibility, so our numbers are directly comparable across brands and models.
How we calculate heel-to-toe drop: Heel stack height minus forefoot stack height equals drop. Simple in principle — the hard part is getting genuinely accurate stack height numbers in the first place, which is exactly why we cut the shoe rather than eyeball it from outside.
Cold-Weather Testing: The Freezer Trick
Room-temperature performance is only half the picture if you’re planning to run, hike, or walk in winter conditions. So after our standard tests, we place the shoe in a freezer for 20 minutes to mimic cold-weather exposure, then re-measure midsole hardness with a durometer.
Comparing the “cold” reading against the room-temperature one tells us how much stiffer (or how much less cushioned) a shoe becomes once the temperature drops — something that matters a lot more than most buyers realize.
Breathability: Three Different Ways We Check It
“Breathable” gets thrown around loosely in footwear marketing, so we test it three separate ways to make sure the rating actually means something.
1. Smoke Test We pump smoke into the shoe using a 3D-printed insert sized to direct it specifically into the toebox — the area that matters most for ventilation. Watching where and how quickly the smoke escapes tells us how well the upper actually moves air. Shoes are scored on a 1–5 scale, with 5 being the most breathable.
2. Flashlight Test Holding a light source behind the upper material reveals overlays, reinforcements, and thicker panels that aren’t always obvious to the eye — and helps explain why smoke didn’t pass through certain spots.
3. Microscope Test Under magnification, we can see exactly why a material breathes well or doesn’t: lots of visible perforations and a thin knit typically means better airflow, while a dense, non-perforated weave usually means poor ventilation — even if the material looks thin from a distance.
Durability Testing: The Rotary Tool Method
To gauge how well a shoe holds up to real-world wear, we apply a rotary abrasion tool (set to a fixed force and speed for consistency) to three high-wear zones: the toebox, the outsole, and the heel padding.
- Outsole durability is scored by measuring the depth of the resulting dent with a tire-tread depth gauge — deeper dent, less durable rubber.
- Toebox and heel padding durability are scored visually on a 1–5 scale based on how much damage occurred, with 5 being the toughest.
This test alone has shown us big gaps between models from the same brand — some heel counters barely mark, while others fray apart within seconds.
Real Leather or Not? The Torch Test
Whenever a brand claims genuine leather or suede, we put that claim to the flame — literally. A brief torch test on the material tells us a lot:
- Chars, scorches, and smells like burnt hair → genuine, dense leather
- Melts, bubbles, or catches fire outright, often revealing synthetic layering underneath → not genuine leather
It’s a quick, decisive way to catch marketing claims that don’t hold up to scrutiny.
Visibility in Low Light
We also test shoes in a completely dark room to check reflectivity — a genuinely useful safety consideration for anyone walking, running, or hiking near roads at dawn, dusk, or night.
How We Choose Which Shoes to Test
We prioritize shoes based on a mix of popularity and relevance — meaning a shoe might jump the queue because it’s a bestseller, or because it fills an important niche (think trail-specific or performance-focused models) even if it’s not a mainstream name yet.
A few ground rules for how we build our testing queue:
- We buy every shoe ourselves, at full retail price, in the size most representative of the general population. If that size isn’t in stock, we wait rather than substitute.
- We test one shoe category per batch (running, hiking, basketball, etc.) so testing conditions stay consistent and comparable.
- Weather plays a role — bad conditions outside might mean we prioritize gym or training shoes that week instead of trail shoes.
- We stick to core categories: running (road and trail), hiking, walking, training, basketball, tennis, cross country, track, and everyday sneakers. Limited-edition colorways and pure collaborations are skipped in favor of the original model.
- No sponsorships, no free samples from brands. Every shoe reviewed on this site was purchased independently, which keeps our conclusions free of brand influence.
Where We Wear-Test Each Category
| Shoe Category | Where We Test It |
|---|---|
| Road Running | Primarily paved roads, occasionally light trails |
| Trail Running | Mixed trail terrain; roads included for shoes with shallower lugs |
| Hiking | Varied trail terrain |
| Walking | Multiple surface types |
| Basketball | Indoor and outdoor courts |
| Track Spikes | Running track |
| Cross Country | Terrain-dependent, matched to spike design |
| Training | Gym environment |
| Tennis | Tennis courts, multiple surfaces |
| Sneakers | General everyday and casual wear |
Lab numbers only go so far — a heel counter that scores a “4” for stiffness in the lab might feel locked-in and stable on one foot, or restrictive on another. Wear testing is what turns raw data into a review you can actually trust.
Our Methodology Timeline
We update our process as better tools and research become available. Here’s a condensed history of major upgrades:
- Breathability & Drying Potential Update — Introduced a dedicated moisture-vapor transmission test using a heated footform and simulated sweating over a multi-hour period, plus a new “drying potential” score for long-distance and multi-day use cases.
- Thermal Insulation Testing — Added cold-weather insulation ratings using controlled energy-loss measurement on an artificial foot.
- Torsional Rigidity Overhaul — Custom-built rig for measuring how much a shoe resists twisting, with repeated conditioning cycles to tighten measurement consistency.
- Durometer Switch (Midsole Softness) — Moved from one hardness scale to a more sensitive one, better suited to today’s softer foam compounds, with historical data recalibrated for comparison.
- Climate Control Upgrade — Installed lab-wide temperature and humidity regulation to eliminate seasonal variation in results.
- Energy Return, Shock Absorption & Traction Overhaul — Adopted recognized drop-test and friction-test standards, including surface-specific traction testing (wet concrete for most categories, a regulation basketball court surface for basketball shoes).
- New Stiffness Machine — Replaced manual force-gauge bending with a repeatable mechanical stiffness test.
- Gel-Mold Fit Measurement — Began using a proprietary gel casting method to capture true interior shoe dimensions (width, toebox width, and toebox height) rather than measuring the outside of the upper.
- Expanded Durability & Rocker Testing — Added heel padding and outsole abrasion testing, plus visual documentation of forefoot and heel rocker geometry.
- Foundational Lab Protocol — Established our original core measurements: weight, width, stack height, insole/tongue thickness, outsole hardness, midsole hardness (room temp and cold), heel stiffness, flex resistance, torsional flex, and breathability.